How to...
Psst...
If setting up artwork isn't your thing just send us your files and for a small fee we can sort it out...

SET UP YOUR ARTWORK FOR EMBELLISHING


Foils
A raised foil print is when partial high raised foil is applied over specific graphic elements on a design. The result strikes a significant contrast, shine, and thickness between the elements that have the Raised Foil and the rest of the design. The raised foil print colour options are gold, silver, rose gold, bronze, holographic, silver holographic gold, red, blue and green.
Varnish
A Raised UV Print is when partial high gloss raised UV is applied over specific graphic elements on a design. The result strikes a significant contrast, shine, and thickness between the elements that have the Raised UV and the rest of the design. Raised UV can be applied to any colour within your design.
Trims + Scores
All trims, scores and folds need a minimum clearance of 5mm from any UV. Please give us a shout if you want UV to bleed to trims or run over scores and folds as this will require a non-standard process and will need to be quoted accordingly.
Let's step you through it
Setting up your artwork for embellishing
- Spot Colour
NB: Whether you are setting up your artwork for Foil or Varnish the process is the same.
01.
First you need to create your Varnish swatch colour by clicking the menu icon within the Swatches palette and selecting New Swatch.
To set up the Varnish Spot Colour:
Set the Swatch Name to Varnish
Set the Colour Type to Spot Colour
Set the Colour Mode to CMYK
Set C, M and K to 0% and Y to 100%
Click OK
02.
This colour will now appear in the swatch palette.
Select the object/text you would like to Varnish and change it to this colour.
03.
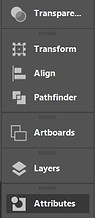
Once all of the objects/text are set to Varnish, open Attributes, which if it is not on your panel interface can be found under the Window menu.
Select the objects which are set to Varnish and set them to Overprint Fill.
Setting up your artwork for embellishing
- New Layer
04.
Next, put them on a separate layer.
This can be done by;
Opening Layers, which if it is not on your panel interface can be found under the Window menu.
Create a new layer by clicking the + within the box. Double click the layer to rename it to Varnish.
05.
Select the objects/text that are set to the Varnish colour, and select the Varnish layer within the tab.
Right click the object/text, then move the mouse over Arrange, then click Send to Current Layer.
This will send the object/text to the Varnish Layer, you will notice if this has worked as the colour of the outer ring when the object is selected has changed colour.

create new Swatch Colour
Varnish
Spot Colour
CMYK
C 0%
M 0%
Y 100%
K 0%


100% Varnish
Overprint Fill


Selection


Double click to rename Varnish


Select Varnish Layer

Your print ready
artwork should
look like this